
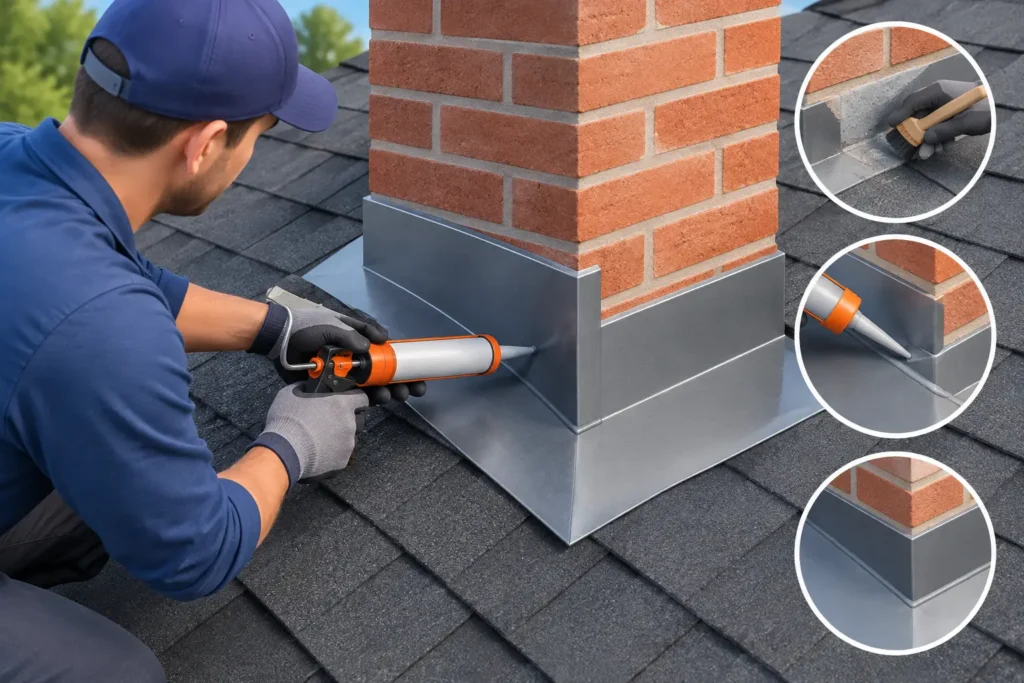
A small gap at roof flashing can put a ceiling, insulation, framing, and electrical system at risk. Learning how to seal roof flashing can help with a minor, accessible repair, but Florida roofs demand more than a bead of caulk. Heavy rain, hurricane-force winds, UV exposure, heat, and salt air can quickly expose a shortcut.
Flashing is the metal material installed where the roof meets a wall, chimney, vent pipe, skylight, valley, or other transition. Its job is to direct water away from vulnerable joints. Sealant supports that water-shedding system. It does not replace damaged flashing, missing fasteners, failed underlayment, or improperly installed shingles.
Start by Finding the Real Source of the Leak
Water rarely enters a roof directly above the stain on the ceiling. It can travel along decking, rafters, flashing, or pipe penetrations before it becomes visible indoors. Before applying any sealant, inspect the area around the suspected leak from the ground and, if it is safe to do so, from the roof.
Look for lifted shingles, cracked sealant, rusted metal, open laps, loose counterflashing, exposed fasteners, and debris trapped behind a chimney or wall. On tile roofs, broken or shifted tiles near flashing can be the actual issue. On low-slope roofs, a failed transition detail or deteriorated coating may be allowing water beneath the system.
If the leak appears after wind-driven rain but not during a normal shower, pay close attention to wall flashing, ridge details, and areas where roofing materials terminate. Wind can force water into openings that seem harmless in dry weather.
Do not seal over a wet surface or assume the first crack you find is the full problem. Trapping moisture beneath sealant can accelerate corrosion and hide damage until the repair becomes more expensive.
Know When Sealing Is the Right Repair
A sealant repair can make sense when flashing is still solid, properly lapped, and securely fastened, but the old sealant has split or separated. Common examples include a small opening around a plumbing vent boot, a minor crack at a metal lap joint, or aged sealant where counterflashing meets masonry.
Sealing is not the right answer when the metal is bent, rusted through, loose, incorrectly installed, or pulling away from the roof. It also will not correct flashing that was placed on top of shingles when it should have been woven into the roofing system. In those cases, water may simply move behind the new sealant.
This distinction matters on Florida homes. A repair that looks acceptable after one rainstorm may fail when the next tropical system pushes water sideways under shingles or tile. If there is any doubt about the flashing detail, replacement is usually the more dependable path.
Materials for Sealing Roof Flashing
Use a roofing-grade sealant that is compatible with both the flashing material and the roof system. Polyurethane, butyl, and high-quality roofing sealants are common choices, but the best product depends on whether the roof is asphalt shingle, metal, tile, modified bitumen, or another system.
Avoid using ordinary household silicone as a universal fix. Some silicones do not adhere well to weathered roofing surfaces, can interfere with future repairs, and may not hold up under prolonged UV exposure. Roofing cement has its place for certain shingle repairs, but it should not be used to bury every flashing problem in black mastic.
For a straightforward repair, gather a stiff brush, rags, a utility knife, a caulk gun, roofing-compatible sealant, gloves, and a putty knife. You may also need replacement corrosion-resistant fasteners if an existing fastener is loose or missing. On coastal properties, corrosion resistance is not optional. Salt air can shorten the life of ordinary hardware.
How to Seal Roof Flashing Step by Step
Only work on a dry roof in stable weather. If the roof is steep, wet, fragile, heavily tiled, or difficult to access, stop there and call a qualified roofing contractor. A fall or broken tile is not a reasonable trade for a small repair.
1. Clean the flashing and surrounding roof surface
Remove leaves, dirt, loose granules, old failing sealant, and any material that prevents the new sealant from bonding. Use a brush and rag, then let the area dry completely. The goal is a clean, sound surface, not a spotless one.
Do not aggressively scrape galvanized metal or coated flashing until it is bare. Damaging protective coatings can invite rust. If the flashing is already heavily corroded, replacement is a better repair than sealing.
2. Inspect laps, edges, and fasteners
Check that each piece of flashing overlaps in the direction water travels. Upper pieces should lap over lower pieces so water sheds downward, not into a joint. Verify that the metal is sitting flat and has not lifted at the edges.
Replace a missing or loose fastener only when you understand what is below it. Driving a screw in the wrong place can create a new leak. When a fastener is required, use one appropriate for the roof material and cover the fastener head with a small amount of compatible sealant.
3. Apply a controlled bead of sealant
Cut the sealant nozzle for a modest bead. Apply sealant only where it belongs: at an open metal lap, around an exposed fastener, at a small separation in a vent flashing flange, or along a counterflashing joint designed to be sealed.
Keep the bead continuous, without gaps, but do not overapply. Excess sealant can trap debris and water, crack as it ages, and make future diagnosis harder. Tool the bead lightly with a putty knife or gloved finger so it contacts both surfaces and sheds water.
A key rule: never seal drainage paths. Some flashing components are designed with weep channels or open lower edges so water can escape. Filling these openings can force water into the roof assembly instead.
4. Check the roofing material around the flashing
Sealant cannot compensate for damaged shingles, loose tiles, cracked pipe boots, or failing underlayment. Replace damaged shingles according to the roof system’s installation requirements. On tile roofs, avoid walking directly on unsupported tiles and do not use sealant as a substitute for properly securing or replacing broken tile.
For metal roofs, inspect screws, washers, panel seams, and closures around the flashing. A failed washer or loose panel fastener may be the leak source, not the flashing itself. For flat roofs, the repair may require membrane-compatible material and detail work that is best handled by a commercial roofing professional.
5. Allow the repair to cure, then monitor it
Give the product the full cure time stated by its manufacturer before exposing it to heavy water where possible. After the next rain, inspect the area from the ground and check the interior for new staining or moisture.
A dry ceiling does not always mean the issue is solved. If insulation or decking was wet, concealed moisture can remain. Watch for musty odors, bubbling paint, soft drywall, or recurring discoloration in the following weeks.
Flashing Repairs That Need a Professional
Call a roofer rather than applying more sealant if you see rust holes, loose chimney flashing, widespread cracked sealant, recurring leaks, sagging roof decking, damaged valley flashing, or leaks near a skylight. The same applies after a major storm. Wind damage can loosen flashing beneath shingles or tile where the problem is not visible from the surface.
Florida building code requirements, roof manufacturer specifications, and insurance documentation can all matter after storm damage. A documented inspection helps establish whether the issue is isolated or part of a larger roof failure. It also prevents a temporary patch from complicating a future claim or replacement.
At Bear Roofing, we approach flashing leaks by identifying the failed detail first, then recommending the repair that protects the entire roof system. No surprises. No disappearing act. A proper repair should leave you knowing where water entered, what was corrected, and what to watch going forward.
Protect the Repair Before the Next Storm
The best time to inspect roof flashing is before hurricane season, not during an active leak. Keep gutters and roof valleys clear, trim branches that scrape roofing materials, and schedule an inspection when you notice lifted shingles, loose tile, or ceiling stains. Small failures at roof transitions can become major interior repairs after one hard-driving storm.
A careful sealant repair can buy time when flashing is otherwise sound. But when the metal, roofing material, or installation detail has failed, the dependable solution is not more caulk. It is a properly integrated repair that sends water where it belongs: off your roof and away from your property.